Diagnostic / Troubleshooting Basics
Codec SelectionThe VigorTalk supports three different 'Codecs' - these are the encoding method for the speech. The bit rate (sample rate) varies on each - a higher bit rate may give better quality but uses more bandwidth. You can experiment as you may find a higher bit-rate codec is unnecessary. To select the Codec, dial 60# on your phone and then press:
You may find that the 8Kb/s codec is quite adequate. You can also set the codec's packet size from the Web Interface (see later). The larger the buffer delay, the better quality the sound can be, but the latency (delay) you will experience is longer. Normally the default setting is optimum.
Summary of IVM Commands (follow each with the # key)
Using the Web InterfaceAlthough the VigorTalk is normally controlled from the telephone handset, it does also have a web interface, accessible from your regular web browser. The VigorTalk must be connected to the same LAN and in the same IP subnet as the PC you're acessing from. To access the VigorTalk, open your browser and enter the VigorTalk's IP address into the address box (e.g. http://192.168.1.10). If you do not know the VigorTalk's current IP address, you can find it out with the 41# command (see earlier). The Web Interface (and telnet, see later) is password protected. The default password for the VigorTalk's Web/Telnet is "vigortalk" (without the quotes). You can use any username, e.g. 'admin'. Using the Dial-Plan (Phone Book)From the VigorTalk's Web User Interface (see above) you can also set up and view the VigorTalk's phone book. This allows you to store commonly called numbers so that you can instead dial them with a simple short-code of your choice. You can include SIP addresses (for any SIP service) or PSTN numbers (to be dialled via DrayTEL). To edit an entry, click on the brown index number on the left on the required entry. To dial one of your phone book entries, lift the handset and dial the index number followed by the # key, for example 123# to dial 'Dave' in the example below. 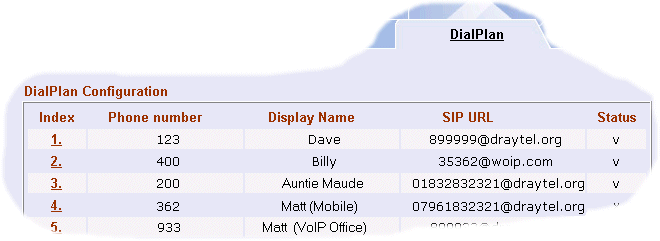
DTMF SelectionIf you are using the DrayTEL Answerphone and wanting to listen to your messages from the phone, rather than email, you will need to check that DTMF is transmitted using the SIP Info method. If not, your keypresses for the answerphone will have no result. You can check/set this from the web interface:
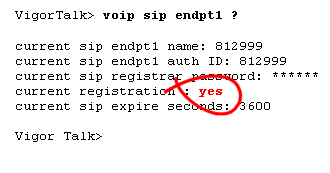
Manual Setting of IP AddressNormally, your VigorTalk will get an IP address and other vital network information from your network's DHCP server. That is normally your broadband router. This is the simplest and preferred method, and the default method for the VigorTalk. If you definitely do need to set the VigorTalk's IP interface manually, you can do that from the web interface most easily, or the handset if you prefer. You must set all four parameters (IP address, mask, gateway and DNS) for the VigorTalk to operate. If you do not understand these concepts, we recommend you don't experiment. Firstly, enter the IVM by dialling ***#. Then 20# to select Static IP setup. You then need to set each parameter in turn, as shown below: 21# - Set IP Address. Use * for 'dot'. End with #. For example 192*168*1*100# Note: To set back to the default DHCP client operation (not static), select 10# from the IVM. Advanced DiagnosticsNormally your VigorTalk will log onto DrayTEL automatically as long as you have the correct username and password specified. The VigorTalk does have additional diagnostic facilities in case of problems. These are accessed by the Telnet interface - from any PC on the same network. To access telnet, in Windows press Start -> Run and then enter telnet.exe x.x.x.x (where x.x.x.x is the IP address of your VigorTalk). To check the IP address of your VigorTalk, press 41# from the IVR. Alternatively, you can use Hyperterminal; see DrayTek's guide here. Once in telnet to the router, you will be asked for the VigorTalk's admin password (default 'vigortalk') and then get to a command prompt, at which you can type commands, followed by the enter key.
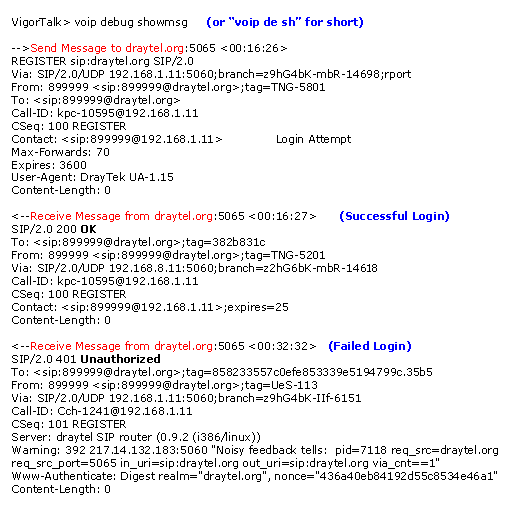
The command to view the VOIP SIP dialogue between VigorTalk and DrayTEL server is voip debug showmsg. The example log below shows the VigorTalk sending a registration message to DrayTEL and DrayTEL confirming it (it is shown for both a successful and a failed attempt, for example due to an incorrect password).
Changing the VigorTalk's Admin PasswordAs explained previously, the Web Interface and Telnet interface of the VigorTalk has a default password of "vigortalk". Anyone with this password can access your VigorTalk and change settings, so if your VigorTalk is on a public IP address, on a LAN with other users or not behind a firewall, you should change the password to something else. To do this, open a telnet session to the VigorTalk (see above) and use the command sys passwd [new password]. The VigorTalk's admin password does not affect your SIP/DrayTEL account password. Take careful note of your new password and type it carefully as you will need it to access the VigorTalk in future. For example to set the admin password to be 'jumper88': VigorTalk> sys passwd jumper88
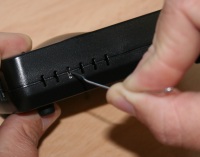
Firmware Upgrade / ReflashWithin the VigorTalk, firmware is the software program which operates every function. This is stored on reprogrammable memory. There may be future firmware upgrade which add features or improve operation. The VigorTalk for DrayTEL requires its own special firmware which you should only obtain from this site (draytel.org). Do not use firmware from other sources or for other products as this may make your unit permanently inoperable. For details of how to reflash firmware Click Here. Further helpIf the setup guide and this page have not helped, please contact us for further guidance: ©2005 SEG. Reproduction in part or full prohibited without written permission. The DrayTEL service is operated independently of DrayTek Corp. and usage is subject to DrayTEL's own service terms - please check current rates/details on the DrayTEL web site. Specification subject to change at any time without notice. E&OE. All sales are subject to standard terms. Trademarks are acknowledged of their respective owners. No specific endorsement is implied by the mention of any particular service provider. |

